With GlowWorm 1.3, we’re excited to add support for Apple Shortcuts! One of the cool things this enables is integration with physical control decks like the Loupedeck and Stream Deck. In the SonicBunny Labs, we’ve got a Loupedeck for testing, so let’s see how to set up a simple button to activate a scene.
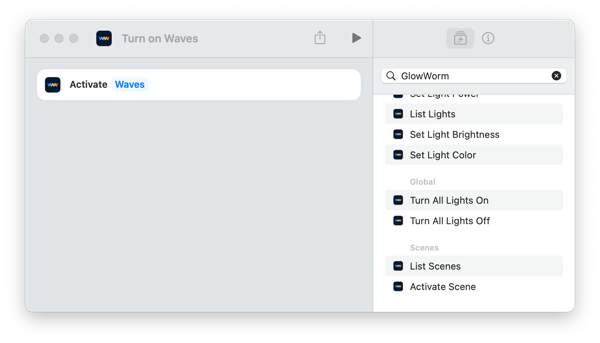
Create a new Apple Shortcut. We’ll call ours ‘Turn on Waves’ because we want to activate a scene called ‘Waves’. (That turns on a rainbow wave on the Labs' Litra Beam LX.) Search for the GlowWorm app in the library sidebar on the right and drag the ‘Activate Scene’ action into the shortcut. Click the ‘Scene’ placeholder and select the scene you’d like to activate. And we’re done with Step 1! You can hit the run button to test the scene.

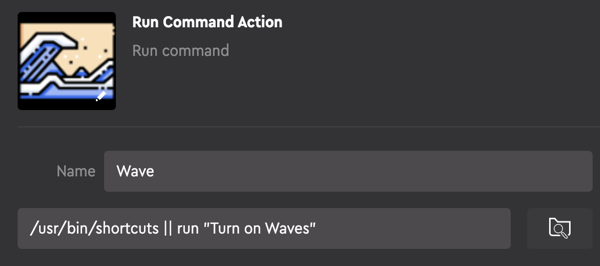
In the LoupedeckConfig tool, you’re going to add a new Custom entry. From the ‘Custom’ list, select ‘Run Command’. In the ‘Paste path here’ box, you’re going to add the following command:
1/usr/bin/shortcuts || run "Turn on Waves"
That runs the command line tool shortcuts with the arguments run "Turn on Waves". Loupedeck uses the || to separate the command and the arguments, so don’t leave those out. Remember, ‘Turn on Waves’ is the name of our shortcut in the Shortcuts app, so if you named yours differently, be sure to adjust. You can also run the command /usr/bin/shortcuts list in the terminal to get a list of the name of all your shortcuts.
To finish setting up your new ‘Run Command Action’, pick a name and set the icon. Once you save all that, you can drag it onto a Loupedeck button and you’re ready to go.

In just two simple steps, we can build a shortcut and assign it to a Loupedeck button. Now any GlowWorm scene is ready at the touch of a button. You can use that to bring up your standard lights as Zoom joins a meeting or you can cycle between scenes to highlight extra drama on your Twitch stream.
Let us know if you’ve got feedback or suggestions for better integration between GlowWorm and Apple Shortcuts!